Among other steps I’ll take, I’ll be doing the following to build the three Victoria models!
Parts Sources
I’ll be purchasing the incredible small bolts and washers from Bob Breslauer’s company, Scale Hardware. Bob is one of the hobby’s great machinists and produces some incredible parts that are used everywhere on contest-winning models: he’s also a very generous contributor to the Museum-Benefit Auction at each GSL Championship (link to: http://www.gslchampionship.org/ ). Scale Hardware offers impossibly small and authentic micro bolts, nuts and washer.
I’ve purchased scale 1/25 scale working ball joints and other micro parts, including stunning spark plugs and micro-miniature bolts, from Bob Bentley who owns RB Motion: http://www.rbmotion.com/ Bob is another manufacturer of micro-miniature scale bolts, nuts and associated parts. Bob’s ball joints and chamfered hex-head bolts will be used in the Vicky Project.
I’ll be retaining the services of a yet-to-be named scale/miniaturist machinist to turn authentic wheels, pulley, and other parts. Here’s a list of machined parts that this Project will require; (Link to list that I’ll e-mail separately)
There will be several engines for the scale Victoria models – a factory blower-equipped 312 Ford 4100-series four barrel for the replica model, a 427 FE for the restyled car, and a 4-V312 for the slot car (yes, there will be plenty of static detail on the slot car). Each of those scale engines will feature a lot of scratchbuilding, photoetched parts, scale bolts and machined parts, and lots of authentic detailing. The Y-Block scale engine will be based upon the excellent Revell ‘57 Ford kit, but will be significantly enhanced to improve its “realism quotient.” Steve Roullier will be create photoetched mating surfaces for the mechanical engine-to-bell housing, bellhousing to transmission, cylinder head intake, and exhaust ports and the like.
Photoetch.1
Caption:
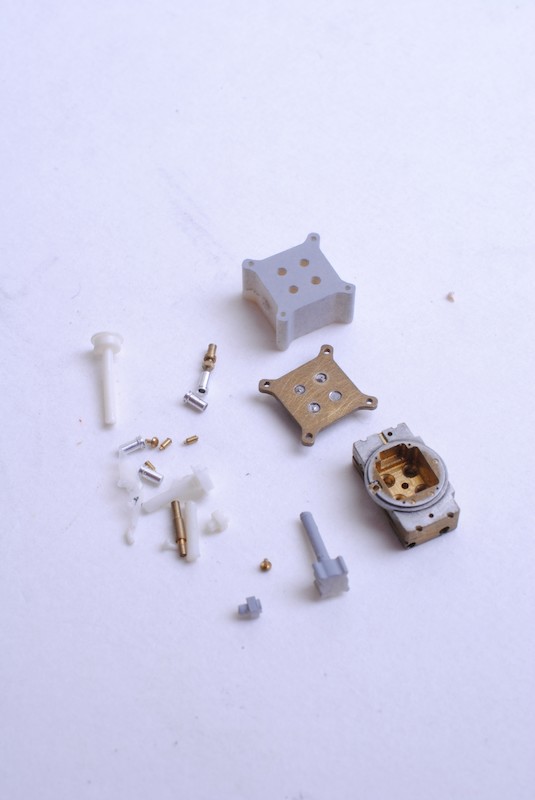
Steve Roullier created these photoetched parts for a 1/25 scale early Ford production 289 five-bolt engine for a another major hobby project that includes the work from builders from Turkey, Finland and the United States. This art was digitalized from dimensioned photographs of 1:1 parts, then reduced to 1/25 scale by Steve Roullier who also photoetched these parts.
The blower motor will feature Norm Veber’s superb resin castings of this Ford 4100 series four barrel carburetor. Cody Grayland created the master parts, some of which are seen here.
I’ll be modifying the upper and lower control arms from the AMT ‘60 Starliner kit (the best version on the market, thanks to Bill Bozgan’s work with AMT when this great kit was being engineered) and then have those parts cast in brass after which I’ll add the machined control arm bushings I’ve on hand. As well, Bentley’s ball joints will be installed in the brass-cast upper and lower control arms. These parts must match the configurations of the actual 1:1 parts.
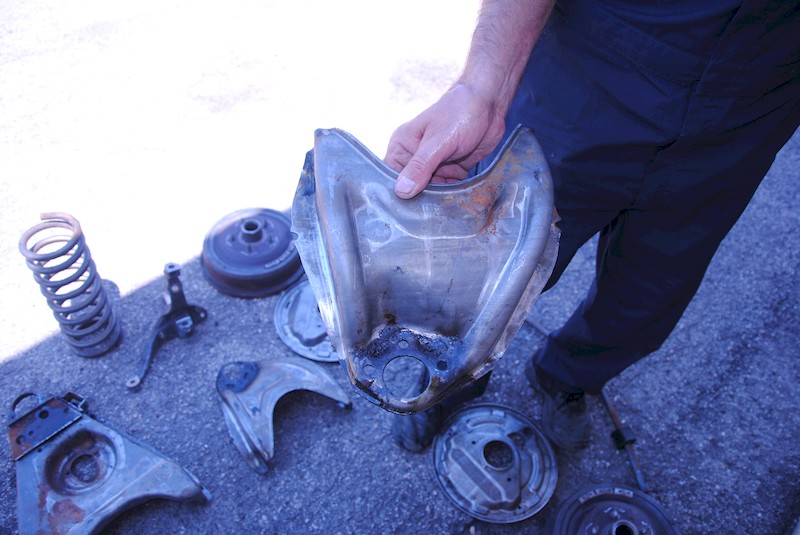
After the 292 Y Block was removed from the car, Mike Smith disassembled the entire front suspension and had the parts hot tanked to get rid of the grease and dirt that had accumulated since 1957. Here’s an upper control arm. I’ll be modifying the basic plastic parts sourced from the AMT 1960 Starliner kit, then having them “lost wax” investment- cast in brass.
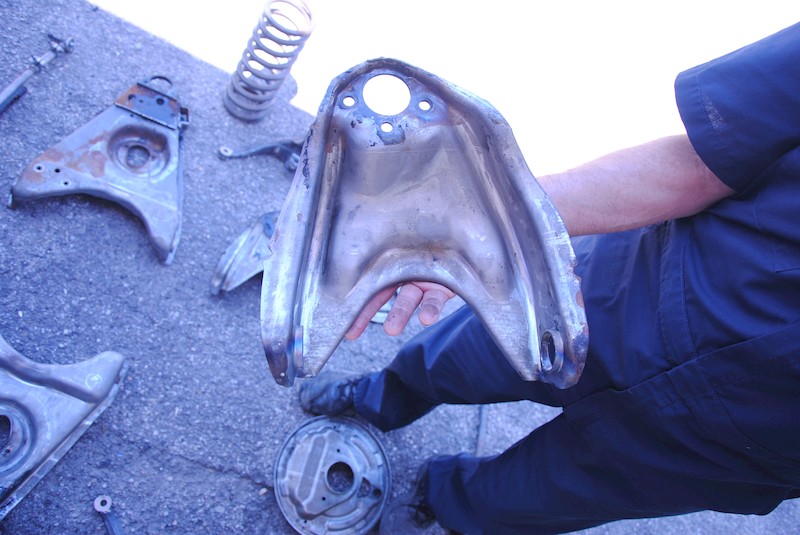
The underside of the same upper control arm evidences the off-set nature of the part (more clearly seen here). We’ll be building a matching part based, again, on the AMT 1960 Starliner kit. Ultimately, Bob Bentley’s functioning ball joints will be installed and Breslauer’s bolts will be used.
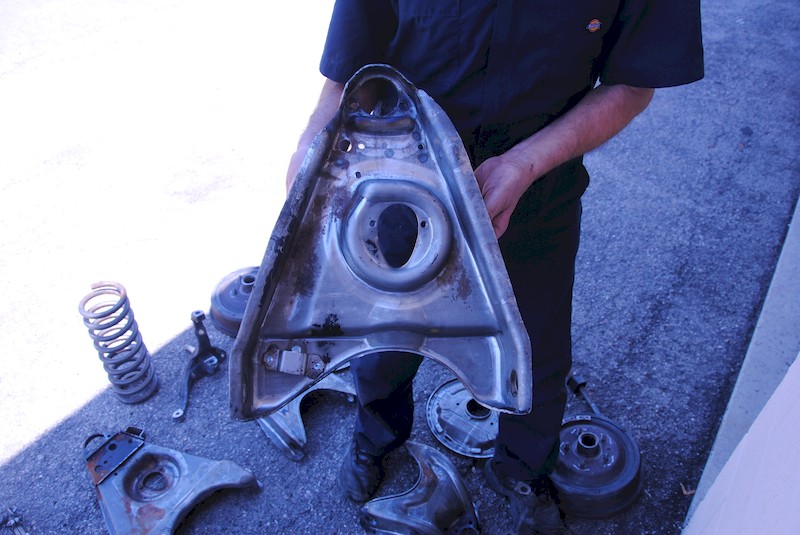
A lower control arm is also a complex part which it not symmetrical front to back. The excellent upper and lower control arms from AMT’s 1960 Starliner kit will be cleaned up a bit, and then investment cast in brass and then machined to accept the upper and lower control-arm bushings that I already have on hand.
Seen from the top, the same lower control arm makes it really clear that the coil spring “seat” is offset.
For the factory stock and restyled Vickies, I’ll be sourcing the underbody/floorboard from Revell’s 1957 Ford Custom kit – it’s the best part available though, again, it needs work to be fully accurate for the longer wheelbase Victoria.
I’ll be using the venerable AMT 1957 Ford kit body which body will be converted from the Fairlane 500 version to the minimalist Club Vicky livery. On the factory stock model, I will fit resin castings (courtesy of The Modelhaus) of specially-made inner engine compartment panels, the firewall (both based upon the Revell 1957 kit parts, but substantially-modified for accuracy) and a correct radiator support – – all mated to the AMT body.
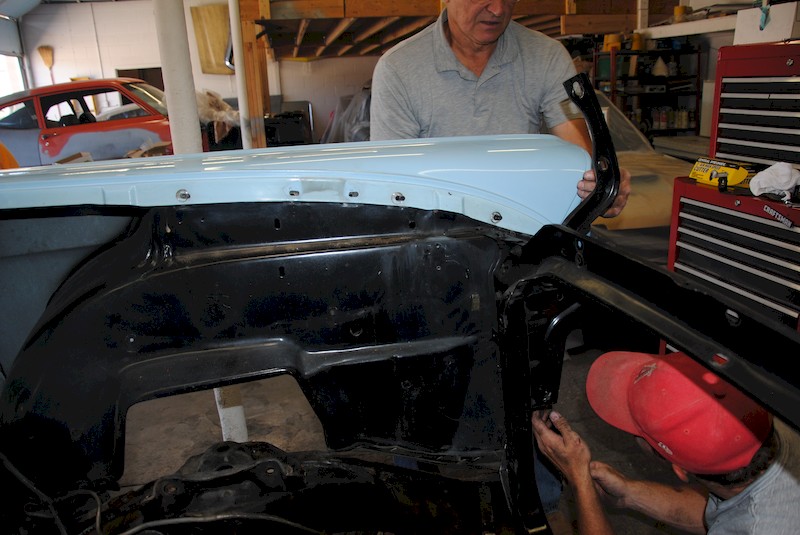
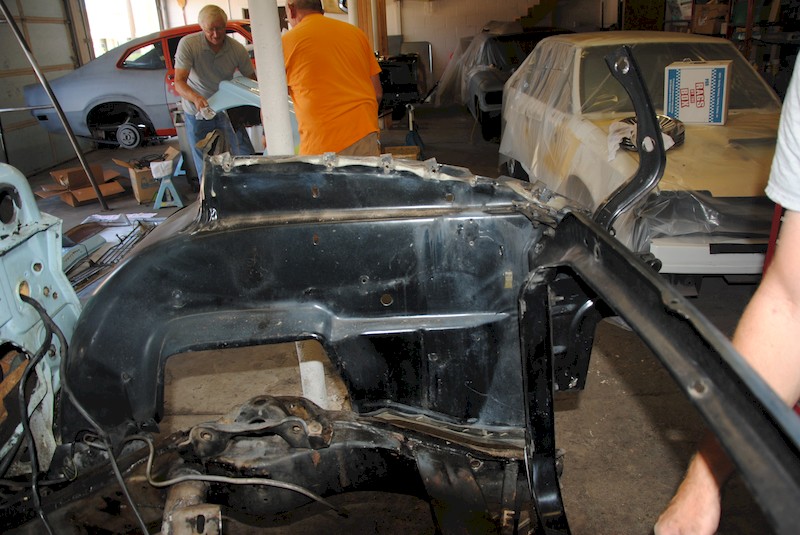
With the exterior sheetmetal about to be removed gently from the car, the full shape and measurements of the inner compartment panel can be seen. The engine compartment panels will be stripped of the factory rubber strips (which kept parts from rubbing against each other and setting up bad squeaks), media-blasted, and then powder coated in high gloss black. That’s Wayne Egbert (L) and George Layton hefting the fenders.
:
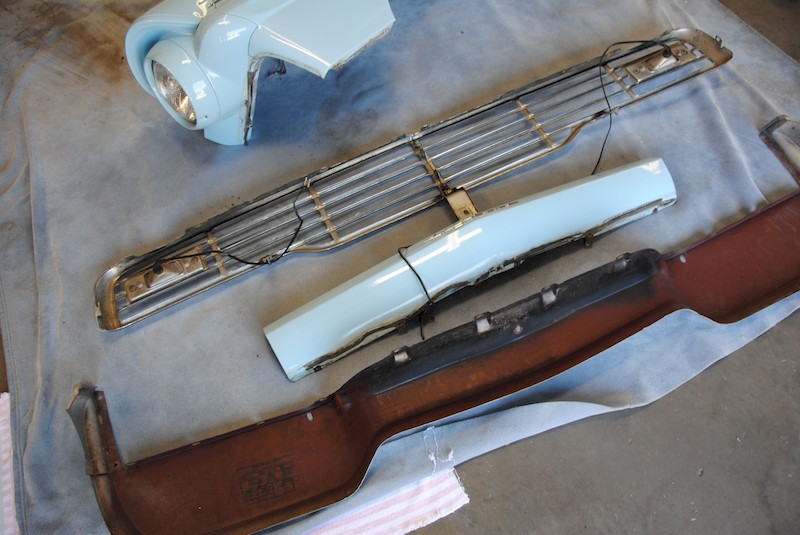
This is interesting – look at the flexible putty under the paint panel that fits between the front fender, and that sits above the grille work: matching putty was found atop the upper extension of the grille. This “goo” was undoubtedly added to both fill the gap and prevent the parts from rattling as they rattled against each other when the car was driven.
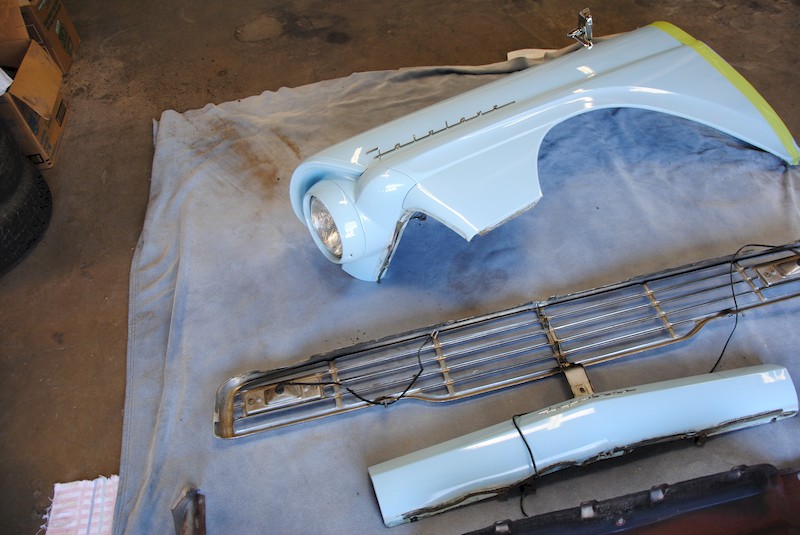
Keeping in mind that the fenders have not been off the car since it was assembled in late 1956, look at the same flexible filler putty underneath the fender, below the headlight, where the grille extends. The parts were placed on a soft towel to prevent damage.
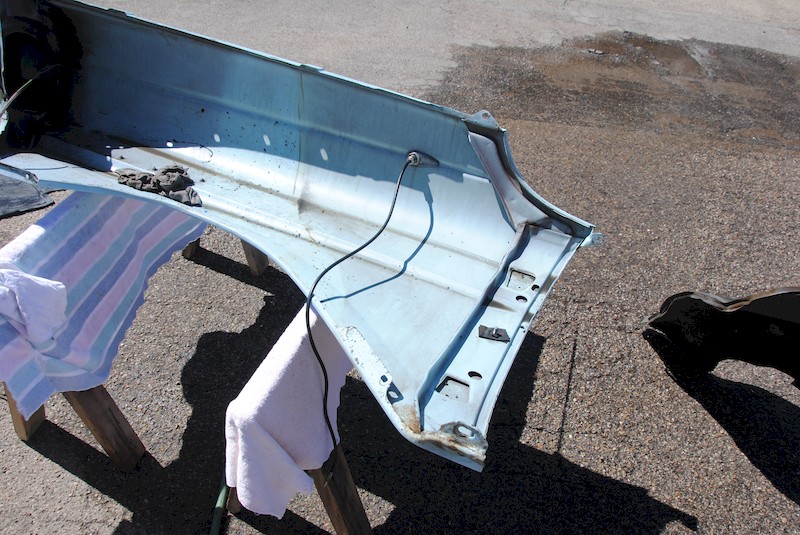
Not a bit of rust anywhere (except for the very bottom-of-fender flange where rocks had chipped the paint. No tin worm! Note how the blue paint was applied about half-way forward on the inner fender – from the point forward, only red oxide primer appears. Plenty of old dirt was found atop the headlight, caked into the extreme upper corner of the fender (where rust typically appears).
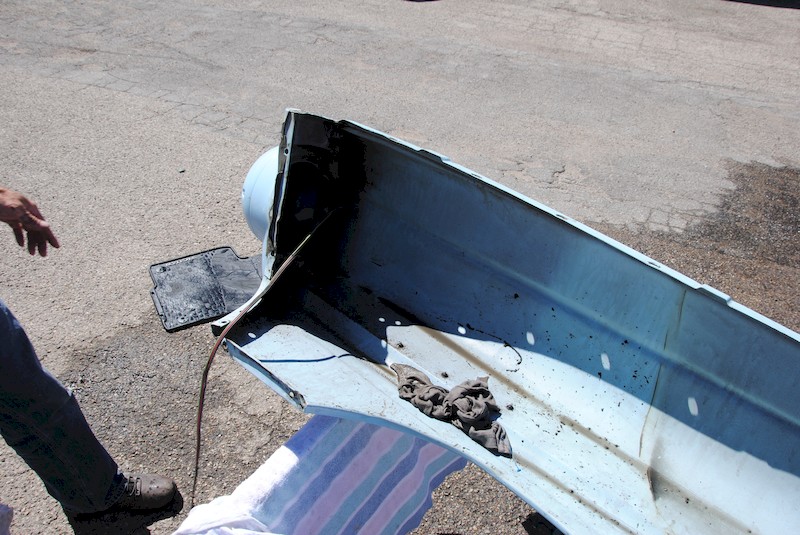
Looking forward and upward in the fender, you can see how the blue color never got applied under the leading edge of the fender.
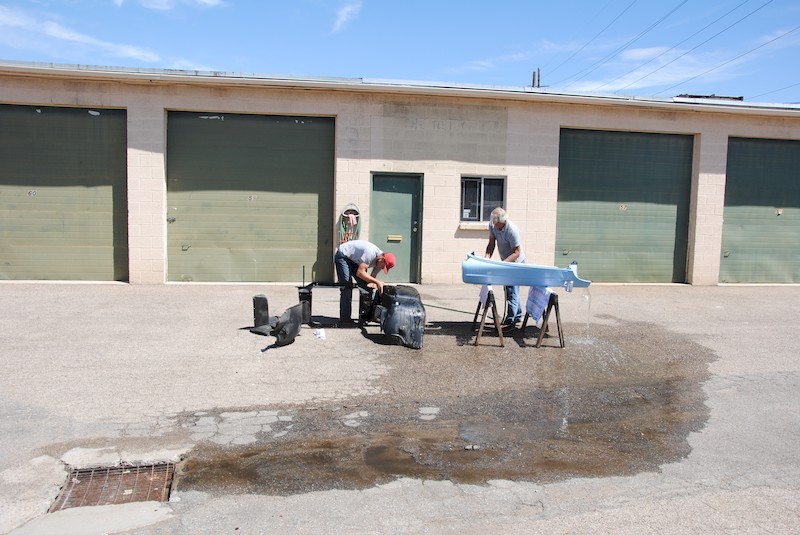
The front clip parts were moved to the center of a driveway, and place atop wooden saw horses over which towels were draped to prevent damage. Several hours were spent with sponges, a lot of water and a great deal of liquid soap to remove decades of ordinary dirt – what a mess!
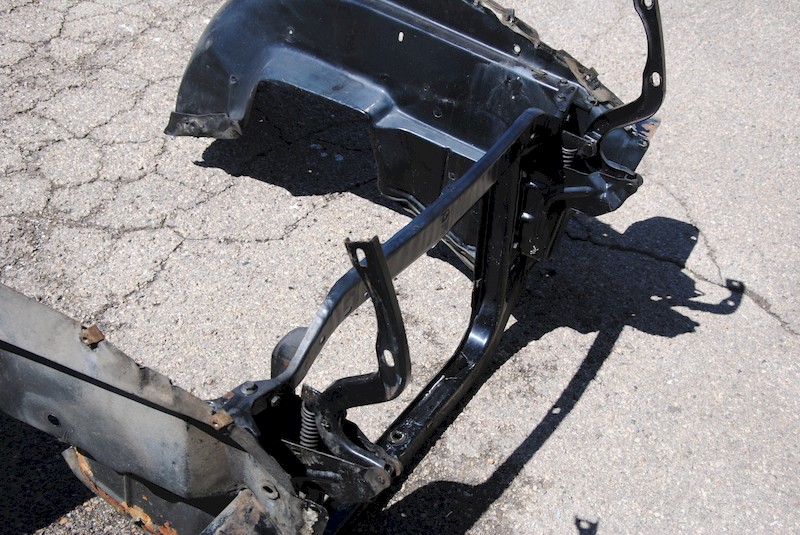
Here, the radiator support, related parts and the engine compartment panels have been removed and are ready to be disassembled for powder coating (after they lightly blasted with glass media).
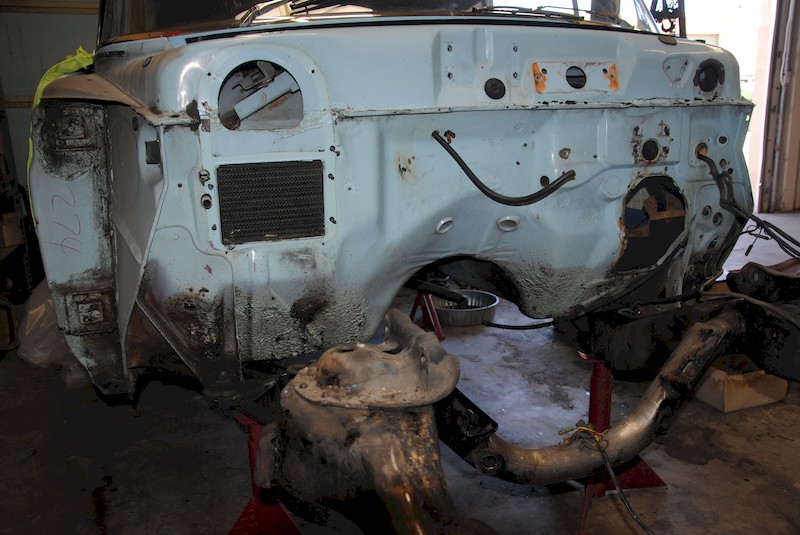
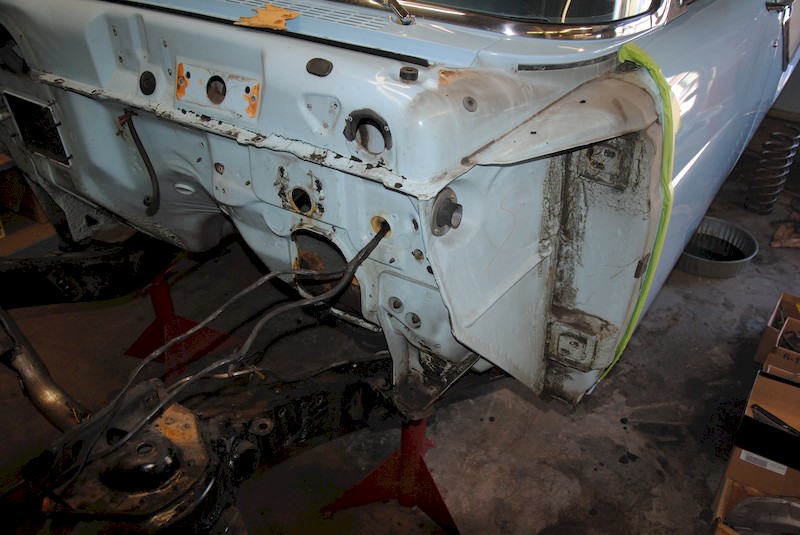
Even though this photo is oblique, check out the rich detail of the real firewall. We’re going to try hard to replicate this shape on the two Vicky models.
I’ll be hammering the hood, doors and trunk from .020 soft brass sheet for the sake of scale fidelity and strength, as well as building correct hinges with adjacent jambs for these panels out of brass, too. With the full scale car at hand, these hinge designs and dimensions can be easily sourced and reduced to 1/25 scale;
Check out what a hinge setup looked like in a body-on-frame configuration in a Fifties car. A sturdy bulkhead is penetrated by the hinge bolts. We determined that the greasy grime under the car was so significant that the car had to be professionally steam cleaned.
The Modelhaus (Don and Carol Holthaus) will be resin-casting the many parts necessary to build a complete and authentic 1957 Club Victoria.

